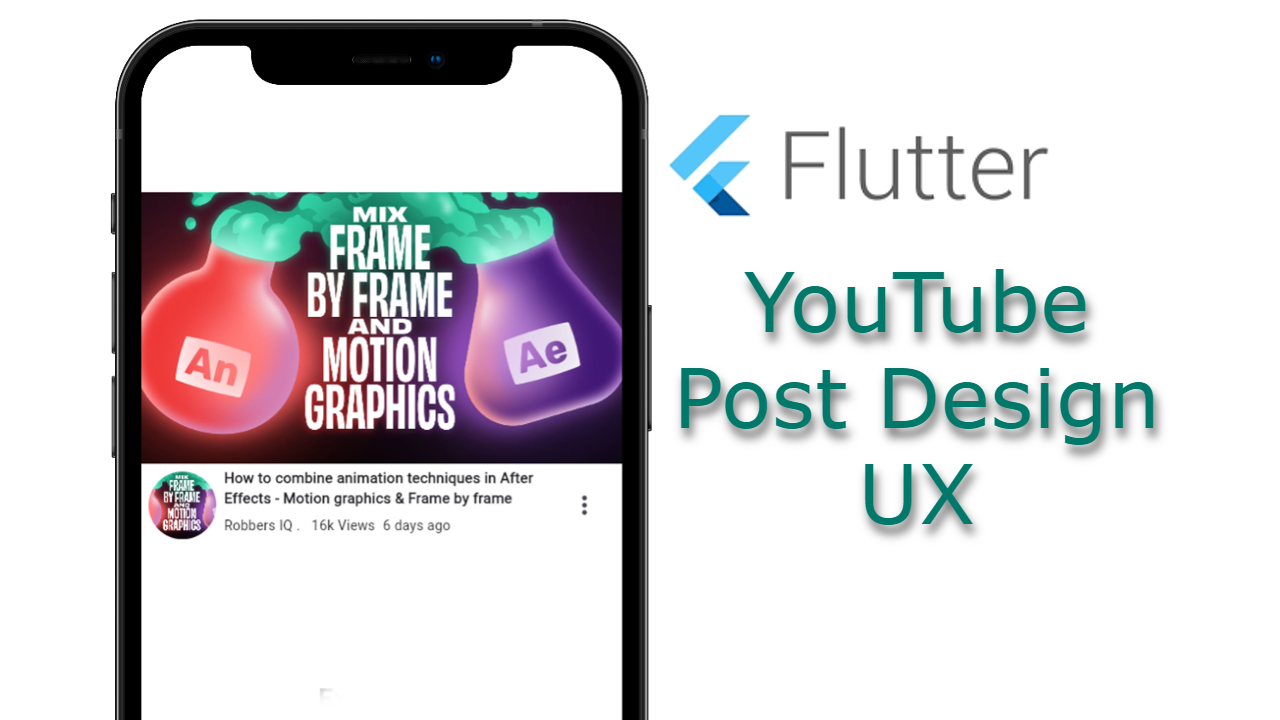
Welcome to Coding Pride, where we help you learn to code with pride. In this tutorial, we’ll guide you through creating a YouTube post design using Flutter. Whether you’re a beginner or an experienced developer, you’ll find this tutorial helpful in enhancing your Flutter skills.
Setting Up Your Flutter Project
Before we dive into the code, make sure you have Flutter installed. If you haven’t done so yet, follow the Flutter installation guide to set it up.
Create a new Flutter project:
flutter create youtube_post_design
cd youtube_post_design
Adding Dependencies
Open the pubspec.yaml file and add the get package to your dependencies:
dependencies:
  flutter:
    sdk: flutter
  get: ^4.6.6
Run flutter pub get to install the new dependencies.
Building the YouTube Post Design
Below is the complete code for our YouTube post design example:
// Welcome to https://codingpride.solutions/
// Learn to code with Coding Pride to earn your pride
// Follow our tutorials for comprehensive guides on Flutter development
// Make sure to check out our website for more tips, tricks, and examples

import 'package:flutter/material.dart';
import 'package:get/get.dart';

void main() {
  runApp(const MyApp());
}

class MyApp extends StatelessWidget {
  const MyApp({super.key});

  @override
  Widget build(BuildContext context) {
    return const GetMaterialApp(
      debugShowCheckedModeBanner: false,
      title: 'Coding Pride',
      home: MyHomePage(),
    );
  }
}

class MyHomePage extends StatefulWidget {
  const MyHomePage({super.key});

  @override
  State<MyHomePage> createState() => _MyHomePageState();
}

class _MyHomePageState extends State<MyHomePage> {
  @override
  void initState() {
    super.initState();
  }

  @override
  Widget build(BuildContext context) {
    return Scaffold(
      backgroundColor: Colors.white,
      body: Center(
        child: Column(
          mainAxisAlignment: MainAxisAlignment.start,
          children: <Widget>[
            const SizedBox(height: 100),
            Image.asset(
              'assets/images/thumbnail.jpg',
              width: MediaQuery.of(context).size.width,
            ),
            Row(
              children: [
                Padding(
                  padding: const EdgeInsets.all(8.0),
                  child: ClipOval(
                    child: Container(
                      width: 70,
                      height: 70,
                      decoration: BoxDecoration(
                        shape: BoxShape.circle,
                        color: Colors.grey[200], // Background color while image loads
                      ),
                      child: Image.asset(
                        'assets/images/thumbnail.jpg',
                        fit: BoxFit.cover,
                      ),
                    ),
                  ),
                ),
                // Title
                SizedBox(
                  width: MediaQuery.of(context).size.width * 0.7,
                  child: const Column(
                    crossAxisAlignment: CrossAxisAlignment.start,
                    children: [
                      Text(
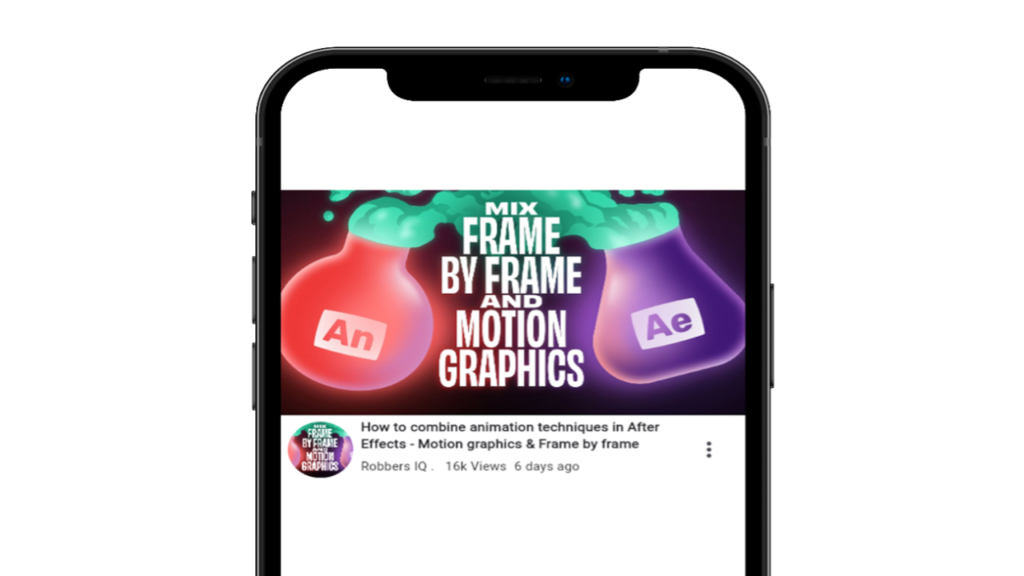
                        "How to combine animation techniques in After Effects - Motion graphics & Frame by frame",
                        style: TextStyle(
                          fontWeight: FontWeight.bold,
                          fontSize: 15,
                        ),
                      ),
                      Row(
                        children: [
                          Text("Robbers IQ . "),
                          Padding(
                            padding: EdgeInsets.all(8.0),
                            child: Text("16k Views"),
                          ),
                          Text("6 days ago"),
                        ],
                      ),
                    ],
                  ),
                ),
                IconButton(
                  onPressed: () {},
                  icon: const Icon(
                    size: 30,
                    Icons.more_vert,
                  ),
                ),
              ],
            ),
          ],
        ),
      ),
    );
  }
}
Explaining the Code
- Main Entry Point: The
mainfunction starts the application by runningMyApp.
void main() {
  runApp(const MyApp());
}
MyApp Widget: This is the root widget of the application. It uses GetMaterialApp to enable easy navigation and state management.
class MyApp extends StatelessWidget {
  const MyApp({super.key});

  @override
  Widget build(BuildContext context) {
    return const GetMaterialApp(
      debugShowCheckedModeBanner: false,
      title: 'Coding Pride',
      home: MyHomePage(),
    );
  }
}
MyHomePage Widget: This widget displays the YouTube_post_design.
class MyHomePage extends StatefulWidget {
  const MyHomePage({super.key});

  @override
  State<MyHomePage> createState() => _MyHomePageState();
}

class _MyHomePageState extends State<MyHomePage> {
  @override
  void initState() {
    super.initState();
  }

  @override
  Widget build(BuildContext context) {
    return Scaffold(
      backgroundColor: Colors.white,
      body: Center(
        child: Column(
          mainAxisAlignment: MainAxisAlignment.start,
          children: <Widget>[
            const SizedBox(height: 100),
            Image.asset(
              'assets/images/thumbnail.jpg',
              width: MediaQuery.of(context).size.width,
            ),
            Row(
              children: [
                Padding(
                  padding: const EdgeInsets.all(8.0),
                  child: ClipOval(
                    child: Container(
                      width: 70,
                      height: 70,
                      decoration: BoxDecoration(
                        shape: BoxShape.circle,
                        color: Colors.grey[200], // Background color while image loads
                      ),
                      child: Image.asset(
                        'assets/images/thumbnail.jpg',
                        fit: BoxFit.cover,
                      ),
                    ),
                  ),
                ),
                // Title
                SizedBox(
                  width: MediaQuery.of(context).size.width * 0.7,
                  child: const Column(
                    crossAxisAlignment: CrossAxisAlignment.start,
                    children: [
                      Text(
                        "How to combine animation techniques in After Effects - Motion graphics & Frame by frame",
                        style: TextStyle(
                          fontWeight: FontWeight.bold,
                          fontSize: 15,
                        ),
                      ),
                      Row(
                        children: [
                          Text("Robbers IQ . "),
                          Padding(
                            padding: EdgeInsets.all(8.0),
                            child: Text("16k Views"),
                          ),
                          Text("6 days ago"),
                        ],
                      ),
                    ],
                  ),
                ),
                IconButton(
                  onPressed: () {},
                  icon: const Icon(
                    size: 30,
                    Icons.more_vert,
                  ),
                ),
              ],
            ),
          ],
        ),
      ),
    );
  }
}
Adding Images
Ensure you have the images (thumbnail.jpg) in the assets/images directory. Update the pubspec.yaml file to include these assets:
flutter:
  assets:
    - assets/images/thumbnail.jpg
Conclusion
You’ve successfully created a YouTube post that looks like a design in Flutter. This example demonstrates using widgets such as Image, Row, Column, and ClipOval to design a visually appealing UI. Keep exploring and building your skills with more tutorials from Coding Pride. For more tips, tricks, and examples, check out our website. Happy coding!
